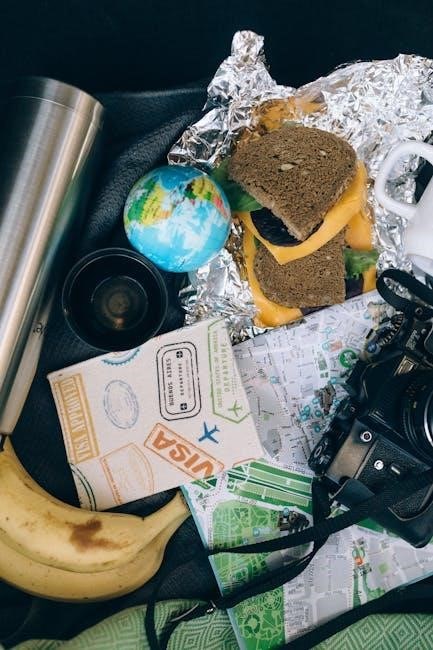
DTF (Direct-to-Film) transfers revolutionize custom apparel printing, offering vibrant, durable designs. This guide explores transfer sizing essentials, ensuring precise placement and professional results for all garment types.
1.1 What Are DTF Transfers?
DTF (Direct-to-Film) transfers are a modern printing method where designs are first printed onto a PET film using eco-solvent inks. The film is then heat-pressed onto garments, creating durable, full-color designs. Unlike screen printing, DTF transfers work on various fabrics, including cotton, polyester, and blends. They’re known for their vibrant colors, soft texture, and long-lasting results, making them ideal for custom apparel and promotional products. This eco-friendly process supports intricate details and small batch production, ensuring high-quality output with minimal setup requirements.
1.2 Benefits of Using DTF Transfers for Custom Apparel
DTF transfers are an excellent choice for custom apparel due to their vibrant colors, durability, and versatility. They work on various fabrics, including cotton, polyester, and blends, making them ideal for diverse designs. The eco-solvent ink ensures soft, breathable prints with minimal cracking over time. DTF transfers are also cost-effective for small batches and intricate designs, offering a professional finish without the need for extensive setup or specialized equipment.

Understanding the Importance of Transfer Size
Transfer size directly impacts design aesthetics and durability. Proper sizing ensures vibrant prints, prevents distortion, and guarantees a professional finish, making it crucial for achieving long-lasting, high-quality results.
2.1 Why Size Matters in DTF Printing
Size is critical in DTF printing as it ensures designs are proportional to garments, preventing distortion and misalignment. Incorrect sizing can lead to loss of detail, making prints appear unprofessional. Properly scaled transfers enhance visual appeal and durability, ensuring vibrant colors and sharp images that withstand washing and wear. Accurate sizing is key to achieving polished, long-lasting results in custom apparel.
2.2 Common Mistakes in Transfer Sizing
Common errors include not measuring garments accurately, using one-size-fits-all templates, and ignoring the 50 rule. Overlooking design proportions and placement can distort prints. Incorrect sizing leads to poor alignment, affecting visual appeal and durability. Always use size charts and test designs to avoid such mistakes, ensuring professional-quality transfers that align perfectly with the intended garment for optimal results.
Factors Influencing DTF Transfer Size
Garment type, design placement, and target audience are key factors affecting DTF transfer size. Printer specs and intended use also play significant roles in determining optimal dimensions.
3.1 Garment Type and Design Placement
Garment type significantly influences DTF transfer size, with t-shirts, hoodies, and hats requiring different dimensions. Design placement, such as front, back, or sleeves, also impacts size. For example, chest designs are typically smaller than full-back prints. Understanding these factors ensures designs fit perfectly, maintaining visual appeal and functionality. Proper sizing enhances durability and comfort, making it essential for professional results in custom apparel printing.
3.2 Target Audience: Adult vs. Youth vs. Toddler
Transfer size varies based on the target audience. Adults typically require larger designs, such as 11×11 inches for chest or back prints. Youth sizes range from 8.5×8.5 to 10.5×10.5 inches, while toddlers need smaller transfers, around 5;5×5.5 inches. Understanding these size differences ensures designs fit appropriately, maintaining visual balance and comfort. Proper sizing enhances both aesthetics and functionality, catering to diverse customer needs effectively.

Standard DTF Transfer Size Chart
Standard DTF transfer sizes range from 5.5×5.5 inches for toddlers to 11×11 inches for adults. Common dimensions include 8.5×8.5 for youth and 10×10 for medium sizes, ensuring proper fit and visual appeal across various garments.
4.1 Adult T-Shirt Sizes
Adult T-shirt DTF transfers typically range from 11×11 inches for front/back designs to 12×16 inches for larger layouts. Standard sizes ensure vibrant, proportional prints, fitting various garment styles. Placement is usually centered on the chest or back, about 5-6 inches below the neckline for optimal visibility. Common sizes also accommodate sleeves and pockets, with dimensions like 2.5×4.5 inches for sleeves and 4.5×4.5 inches for pockets, ensuring a professional finish every time.
4.2 Youth and Toddler Sizes
Youth and toddler DTF transfers are smaller to fit younger audiences. Youth sizes range from 8.5×8.5 inches for small to 10.5×10.5 inches for medium or large. Toddler transfers are typically 5.5×5.5 inches. These sizes ensure designs are proportionate and comfortable, with placement centered on the chest, about 3-4 inches below the neckline for optimal visibility and appeal, making them ideal for kids’ apparel.
4.3 Pocket and Sleeve Sizes
Pocket transfers are typically 100×100 mm, ideal for small designs or embellishments. Sleeve transfers are usually 180×100 mm, perfect for narrow, vertical placements. These sizes ensure designs fit seamlessly on smaller areas without overwhelming the garment. Placement should be centered for pockets and vertically aligned for sleeves, maintaining balance and visual appeal while accommodating the unique dimensions of these areas.
DTF Transfer Placement Guide
Proper placement ensures designs look great. Use standard positions like chest center or back for balanced looks. Align transfers with garment seams for professional results and visual appeal.
5.1 Front and Back Placement Dimensions
For front placement, standard sizes range from 10×10 inches for youth to 12×12 inches for adults. Back designs are often larger, typically 12×14 inches or 12×16 inches. Pocket transfers are smaller, around 4×4 inches. Ensure designs align with seams and chest centers for balanced looks. Measure garments carefully to avoid distortion. Use visual guides or templates for precise placement, ensuring designs fit naturally on the intended area.
5.2 Sleeve and Pocket Placement Recommendations
Sleeve transfers typically range from 2×8 inches for small designs to 4×12 inches for larger graphics. Pocket transfers are usually 4×4 inches, centered on the pocket area. Ensure designs align with seams and are proportional to the garment. For sleeves, place designs 1-2 inches above the cuff for a balanced look. Use online templates or mockups to visualize placement before printing for precise results every time.

Specialized Transfer Sizes
Specialized sizes include A3 (300x420mm) and A4 (210x300mm) for large formats, ideal for bold designs. A5 (150x210mm) suits small applications like kids’ apparel or pocket designs.
6.1 Large Formats (A3 and A4)
Larger formats like A3 (300x420mm) and A4 (210x300mm) are perfect for bold, detailed designs. A3 is ideal for full-back prints on hoodies or jackets, while A4 works well for large front designs on t-shirts. These sizes ensure high visibility and are great for promotional apparel or intricate artwork. They offer maximum impact, making them a favorite for eye-catching designs.
6.2 Small Formats (A5 and Custom Sizes)
A5 (150x210mm) and custom sizes are ideal for smaller designs, such as logos, sleeve prints, or pocket placements. These formats are perfect for children’s apparel, offering a tailored fit. Custom sizes allow flexibility for unique designs, ensuring precision and detail. Higher resolution settings are recommended for small formats to maintain clarity in intricate artwork, making them versatile for various creative applications while ensuring professional-quality results.
Printer Specifications and Transfer Size
Printer resolution and model significantly impact transfer size. Popular DTF printers like Epson and Ricoh offer various sizes, ensuring high-quality output for different garment applications.
7.1 How Printer Resolution Impacts Transfer Size
Printer resolution directly influences the clarity and precision of DTF transfers. Higher resolutions, such as 720×1440 dpi, ensure intricate details are preserved, while lower resolutions may blurry small text or fine lines. Proper setup of RIP software optimizes print quality, maintaining consistent output across various transfer sizes and garment types. This ensures professional results every time.
Leading DTF printer models like Procolored offer advanced features, supporting sizes from A5 to A3. With capacities ranging from 450x550mm to larger formats, these printers cater to diverse projects. They utilize CMYK with white ink, ensuring vivid colors and precise registration. Models vary in resolution and speed, making them suitable for both small-scale and high-volume production, ensuring versatility for any printing need. RIP software ensures precision printing, while online size charts and templates provide guidance. Transfer placement cheat sheets simplify design alignment, aiding in achieving professional-quality results consistently. RIP (Raster Image Processor) software is essential for precise DTF printing. It optimizes print settings, ensuring accurate transfer sizes and vibrant colors. Main Top RIP software supports various printers, offering 720×1440 dpi resolution and compatibility with Windows systems. It enhances print quality by adjusting parameters like ink density and dot size. This tool is crucial for maintaining consistency and achieving professional results in custom apparel printing. Online size charts and templates are invaluable for DTF transfers, providing precise dimensions for various garments. These resources offer visual guides for placements like chest, sleeve, and pocket designs. They help ensure designs fit perfectly on t-shirts, hoodies, and other apparel. By using these tools, you can avoid sizing errors and achieve professional-quality prints consistently. They simplify the process, making it easier to select the right size for any project. Measure garments precisely and use a transfer placement cheat sheet for accurate sizing. This ensures designs fit perfectly, achieving crisp, professional results every time. Accurate garment measurement is crucial for DTF transfers. Use a ruler or tape measure to ensure designs fit properly. Center designs on the chest for a balanced look. For adult tees, aim for 11×11 inches; youth sizes range from 8.5×8.5 to 10.5×10.5 inches. Pocket designs should be around 5×5 inches. Always check the manufacturer’s size chart and use a placement cheat sheet for consistent results. A transfer placement cheat sheet is a valuable tool for ensuring designs are centered and proportionate. It helps avoid common mistakes like off-center prints or incorrect sizing. Use the 50 rule: ensure text is at least 50 pixels high for clarity. Measure garments and refer to the cheat sheet for precise placement on front, back, sleeves, or pockets. This ensures professional-looking results every time. Frequently asked questions about DTF transfer sizes include choosing the right size for garments, adjusting for shrinkage, and avoiding distortion. This section provides clear solutions. The 50 Rule in transfer sizing ensures designs are legible and visually appealing. It recommends that text height should be at least 50 pixels for optimal clarity. This rule prevents distortion and ensures details remain crisp, especially on larger prints. By adhering to this guideline, designers can maintain professional results across various garment sizes and materials. To avoid distortion in large DTF transfers, ensure designs are high-resolution and scaled proportionally. Use RIP software for precise adjustments and select printers with high dpi capabilities. Properly align the transfer on the garment, and test smaller samples before full-scale printing. This ensures crisp, clear results even on larger formats like A3 or A4, maintaining professional-quality output. Mastering DTF transfer sizing ensures precision and consistency. Use tools like the 50 rule and RIP software to achieve professional results and elevate your custom apparel projects. DTF transfer sizing is crucial for professional results. Garment type, target audience, and design placement guide size selection. Standard charts provide dimensions for adults, youth, and toddlers, while specialized formats like A3, A4, and A5 cater to specific needs. Printer resolution and RIP software ensure precision. Tools like size charts and cheat sheets simplify the process. Measuring garments and avoiding distortion in large transfers are essential for success. Mastery of these elements elevates custom apparel projects to a professional level. To master DTF transfer sizing, always use the 50 rule for consistent results. Measure garments precisely and test designs on smaller formats first. Invest in RIP software for accuracy and utilize online size charts. Avoid stretching or distorting images for large transfers. Keep designs proportional to garment sizes, especially for youth and toddlers. Regularly update printer settings and maintain ink circulation systems for optimal performance. These practices ensure professional-quality transfers every time.7.2 Popular DTF Printer Models and Their Capabilities
Tools and Resources for Accurate Sizing
8.1 RIP Software for Precision Printing
8.2 Online Size Charts and Templates
Tips for Achieving Professional Results
9.1 Measuring Garments for Perfect Fit
9.2 Using a Transfer Placement Cheat Sheet
Common Transfer Size FAQs
10.1 What Is the 50 Rule in Transfer Sizing?
10.2 How to Avoid Distortion in Large Transfers
11.1 Summary of Key Takeaways
11.2 Final Tips for Mastering DTF Transfer Sizing