Bilstein 5100 shock absorbers are highly regarded for their exceptional performance and durability. Designed to enhance vehicle stability and control, they offer a significant upgrade over factory shocks.
1.1 Overview of Bilstein 5100 Series
The Bilstein 5100 Series is a popular choice for off-road enthusiasts and drivers seeking improved suspension performance. These shocks are designed to provide superior damping control, reducing body roll and enhancing stability. Made with high-quality materials, they offer excellent durability and resistance to fade. The 5100 Series is known for its monotube design, which ensures consistent performance under varying conditions. They are also adjustable, allowing drivers to customize their ride height and stiffness. These shocks are ideal for vehicles used for towing, hauling, or driving on uneven terrain, making them a versatile upgrade for both on-road and off-road applications.
1.2 Benefits of Upgrading to Bilstein 5100 Shocks
Upgrading to Bilstein 5100 shocks offers numerous benefits, including improved handling, reduced body roll, and enhanced stability. These shocks provide better damping control, resulting in a smoother ride on both on-road and off-road surfaces. Their durable construction ensures long-lasting performance and resistance to fade. Additionally, the 5100 Series allows for adjustable ride height, making them ideal for vehicles with heavy loads or aftermarket lifts. By upgrading, drivers can experience improved towing and hauling capabilities, as well as increased confidence in various driving conditions. This makes the Bilstein 5100 a versatile and reliable choice for enthusiasts and everyday drivers alike.

Pre-Installation Preparation
Gather tools, a chassis hoist, and safety equipment. Wear protective gear and ensure the vehicle is on level ground with proper support before starting the installation.
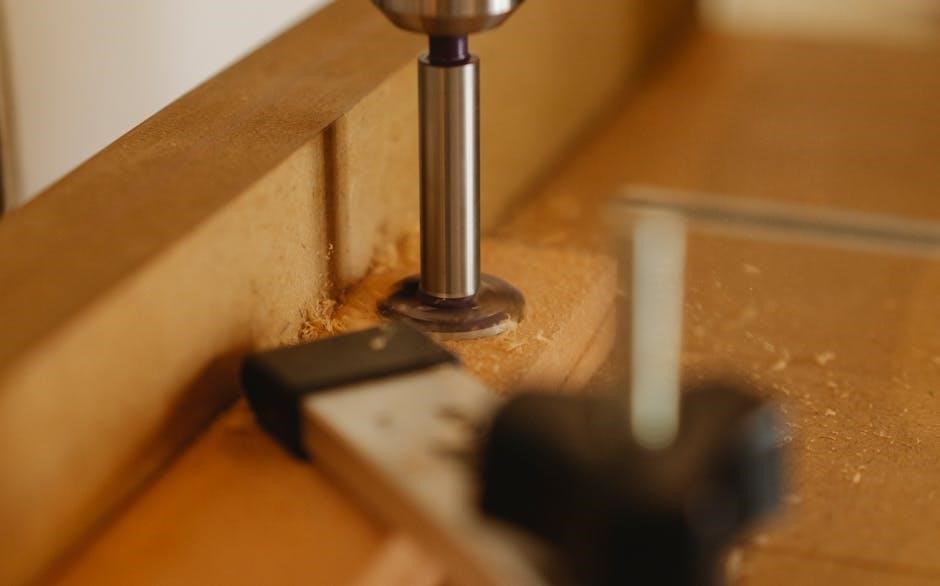
2.1 Tools and Equipment Required
Tools and equipment needed include a chassis hoist, spring compressor, wrenches, sockets, and torque wrench. Ensure you have a full set of metric and SAE tools. A 9/16ths ratchet wrench is essential for shock absorber nuts. Protective gear like gloves and safety glasses is mandatory. A workbench and vice may be useful for disassembly. Refer to the vehicle’s manual for specific tools. Ensure all equipment is in good condition to avoid accidents during the installation process. Proper tools ensure a safe and efficient installation of Bilstein 5100 shocks.
2.2 Safety Precautions and Vehicle Setup
Safety is paramount when installing Bilstein 5100 shocks. Always lift the vehicle using a chassis hoist or jack stands, ensuring it is stable and secure. Wear protective gear like gloves and safety glasses. Disconnect the battery to prevent accidental startups. Never work under an unsupported vehicle. Ensure proper ventilation and avoid overheating tools. Follow the vehicle manufacturer’s guidelines for lifting points. Proper setup and preparation prevent accidents and ensure a smooth installation process for your Bilstein 5100 shocks.

Disassembling the Front Suspension
Begin by removing the wheel and accessing the shock absorber. Use a wrench to loosen the nuts securing the shock and coil spring assembly. Proceed cautiously, ensuring all components are safely supported during disassembly to avoid damage or injury.
3.1 Removing the Wheel and Accessing the Shock
Start by loosening the lug nuts using a wrench before raising the vehicle. Use a hydraulic jack and jack stands for safety. Remove the wheel and set it aside. Access the shock absorber by locating it near the coil spring. Ensure the vehicle is securely supported to prevent any movement. Disconnect any electrical connectors or brake lines attached to the shock absorber, if applicable. Be cautious of the spring’s tension, as it can cause injury if mishandled. Follow manufacturer guidelines to ensure proper disassembly and safety throughout the process.
3.2 Disconnecting the Coil Spring and Shock Absorber
Disconnect the shock absorber from the steering knuckle by removing the nut and washer. Use a wrench to loosen the bolt on the lower control arm. Carefully compress the coil spring using a spring compressor to relieve tension. Once compressed, remove the retaining ring or circlip that holds the spring in place. Slowly release the compressor and lift the spring off the shock absorber. Be cautious, as the spring is under high tension and can cause injury if mishandled. Follow Bilstein’s specific instructions for safe disconnection.

Handling the Coil Spring
Safely compress the coil spring using a spring compressor to remove it from the shock absorber. Ensure proper technique to avoid injury or damage.
4.1 Safely Compressing and Removing the Coil Spring
To safely compress the coil spring, use a high-quality spring compressor specifically designed for this task. Attach the compressor to the spring and tighten gradually, ensuring even pressure. Wear protective gear, including gloves and safety glasses. Once the spring is fully compressed, carefully remove it from the shock absorber, taking note of any retaining clips or components. Always follow proper techniques to avoid accidents, as springs under tension can be hazardous. Proper tools and caution are essential for this step to ensure safety and avoid damage to the suspension system.
4.2 Installing the Coil Spring on the New Bilstein 5100
Align the coil spring with the Bilstein 5100 shock absorber, ensuring proper seating and orientation. Use a spring compressor to hold the spring in place while installing. Carefully slide the spring over the shock, making sure it is fully seated. Use a torque wrench to tighten the upper spring seat according to manufacturer specifications. Double-check the alignment and ensure the spring is securely fastened. Proper installation ensures optimal performance and safety. Refer to torque specifications in the installation manual for precise values.

Installing the Bilstein 5100 Shock Absorber
Mount the Bilstein 5100 shock absorber to the vehicle, ensuring proper alignment with the suspension components. Tighten the lower mounting bolt first, followed by the upper nut, using a torque wrench to meet manufacturer specifications. Double-check all connections for security and alignment before proceeding. Proper installation ensures optimal performance and safety. Always refer to the provided instructions for specific torque values and sequencing.
5.1 Mounting the Shock Absorber to the Vehicle
Align the Bilstein 5100 shock absorber with the vehicle’s suspension mounting points, ensuring proper orientation. Secure the shock absorber using the provided hardware, tightening the lower bolt first. Use a torque wrench to tighten all bolts to the manufacturer’s specifications. Ensure the shock absorber is snug and evenly seated to avoid misalignment. Double-check the connections to confirm they are secure and properly aligned. This step is critical for maintaining suspension integrity and ensuring optimal performance. Always refer to the installation guide for specific torque values and sequencing to guarantee safety and reliability.
5.2 Adjusting the Shock Height and Reassembling Components
After mounting the Bilstein 5100 shock absorber, adjust the shock height by positioning the circlip or snap ring to the desired setting. Ensure the shock is securely seated and aligned properly. Reassemble suspension components, starting with the coil spring and any brackets or mounts. Tighten all bolts and nuts to the manufacturer’s torque specifications using a torque wrench. Double-check all connections for tightness and alignment. Finally, verify the ride height and ensure proper suspension geometry before test driving the vehicle.
Reassembling the Suspension System
Reattach all suspension components, ensuring proper alignment and secure connections. Tighten bolts and nuts to manufacturer specifications using a torque wrench for safety and optimal performance.
6.1 Reconnecting Suspension Components
Reconnect the suspension components carefully to avoid damage. Ensure the shock absorber is securely attached to the vehicle and properly aligned. Reattach the coil spring, making sure it is seated correctly. Use a torque wrench to tighten bolts and nuts to the manufacturer’s specifications. Avoid overtightening, as this can damage the suspension system. Double-check all connections for stability and alignment. Once reconnected, inspect the components for any signs of wear or misalignment. Proper reconnection is crucial for optimal performance and safety. Ensure all parts are securely fastened before test driving the vehicle.
6.2 Tightening All Bolts and Nuts to Specifications
Tightening all bolts and nuts to the correct torque specifications is a critical step. Use a torque wrench to ensure accuracy, as overtightening can damage components. Refer to the vehicle’s manufacturer specifications or the Bilstein installation manual for exact torque values. Start with the shock absorber mounting bolts, then move to the coil spring and other suspension components. Double-check each connection to confirm proper tightness and alignment. Ensure all nuts and bolts are securely fastened to prevent loosening over time. This step is essential for maintaining safety and optimal suspension performance.
Post-Installation Testing
After installation, perform a test drive to assess suspension performance and ride quality. Ensure proper alignment and ride height are maintained for optimal handling and safety.
7.1 Testing the Vehicle’s Suspension Performance
After installing the Bilstein 5100 shocks, conduct a thorough test drive to evaluate suspension performance. Check for smoothness, stability, and responsiveness on various road surfaces. Ensure the vehicle handles bumps and corners effectively, with minimal body roll. Test braking and acceleration to confirm improved control and reduced nosedive. Listen for any unusual noises, which could indicate improper installation or component issues. Verify that the shocks absorbers dampen movements consistently, providing a balanced and comfortable ride. Proper testing ensures the upgrade meets expectations and functions as intended.
7.2 Ensuring Proper Alignment and Ride Height
After installation, verify the vehicle’s alignment and ride height to ensure proper suspension functionality. Use a torque wrench to tighten all components according to specifications. Check the ride height adjustment on the Bilstein 5100 shocks, ensuring it aligns with the manufacturer’s recommendations; Test the vehicle on a level surface to confirm even weight distribution. If necessary, adjust the shocks to achieve the desired height and balance. Finally, have the vehicle professionally aligned to ensure optimal performance and prevent uneven tire wear. Proper alignment guarantees safety and enhances the shocks’ effectiveness. Always refer to the manufacturer’s guidelines for precise adjustments.

Additional Tips and Best Practices
Always follow torque specifications and consult the vehicle’s manual for specific instructions. Regularly inspect and maintain the Bilstein 5100 shocks to ensure optimal performance and longevity.
8.1 Importance of Proper Torque Specifications
Proper torque specifications are crucial during the installation of Bilstein 5100 shocks to ensure safety and performance. Using the correct torque values prevents damage to components and guarantees a secure fit. Always refer to the vehicle manufacturer’s guidelines and the Bilstein installation manual for precise torque settings. Improper torque can lead to loose connections, reduced handling, and potential failure of the suspension system. This step requires attention to detail to maintain the integrity of the setup and ensure the shocks function optimally.
8.2 Regular Maintenance for Bilstein 5100 Shocks
Regular maintenance is essential to ensure the longevity and performance of Bilstein 5100 shocks. Inspect the shocks and surrounding components for signs of wear, rust, or damage. Clean the shock absorbers and coil springs to prevent dirt buildup, which can affect performance. Check the dust boots for tears or debris and replace them if necessary. Lubricate moving parts as recommended by Bilstein. Additionally, have the shocks inspected professionally every 6 to 12 months or after extreme off-road use to maintain optimal functionality and safety.
Upgrading to Bilstein 5100 shocks enhances vehicle performance and ride quality. Proper installation and maintenance ensure long-term reliability, making it a worthwhile investment for enthusiasts and drivers alike.
9.1 Summary of Installation Process
The installation of Bilstein 5100 shock absorbers involves several precise steps, including disassembling the front suspension, safely handling the coil spring, and mounting the new shocks. Proper tools and safety precautions are essential to ensure a smooth process. After installing the shocks, reassembling the suspension and tightening all components to specifications is crucial. Finally, post-installation testing ensures optimal performance and alignment. By following the instructions carefully, drivers can enjoy improved handling and ride quality provided by the Bilstein 5100 series.
9.2 Final Thoughts on Upgrading to Bilstein 5100
Upgrading to Bilstein 5100 shock absorbers is a decision that enhances both on-road stability and off-road capabilities. Known for their durability and performance, these shocks offer a noticeable improvement in ride quality and control. The installation process, while requiring attention to detail, is manageable with proper tools and guidance. For drivers seeking a reliable and high-quality suspension upgrade, the Bilstein 5100 series is an excellent choice, delivering long-term satisfaction and improved vehicle handling.