Welcome to the Honeywell 3000 Installation Guide, your comprehensive resource for installing and configuring the Honeywell PRO 3000 Non-Programmable Digital Thermostat. This guide provides step-by-step instructions, ensuring a smooth and safe installation process for both new and experienced users. With detailed sections on wallplate installation, wiring, and advanced setup, you’ll find everything needed to get your thermostat up and running efficiently.
1.1 Overview of the Honeywell 3000 Thermostat
The Honeywell PRO 3000 is a non-programmable digital thermostat designed for ease of use and compatibility with various HVAC systems, including heat pumps. It features a straightforward interface, built-in compressor protection, and a clear display for precise temperature control. Ideal for homeowners seeking a reliable, energy-efficient solution, it ensures consistent comfort with minimal complexity.
1.2 Importance of Proper Installation
Proper installation of the Honeywell 3000 thermostat is crucial for safety, efficiency, and optimal performance. Incorrect wiring or setup can lead to system malfunctions, increased energy bills, or even safety hazards. Following the installation guide ensures reliable operation, maintains warranty validity, and guarantees consistent heating and cooling performance for your home.
Pre-Installation Requirements
Before starting, ensure you have all necessary tools, materials, and safety precautions in place. Verify system compatibility and shut off power at the circuit breaker.
2;1 Tools and Materials Needed
To install the Honeywell 3000, gather essential tools: a screwdriver, wire strippers, pliers, and a level. Ensure you have mounting screws, wire connectors, and a voltage tester. Refer to the manual for specific materials and compatibility details to ensure a smooth installation process.
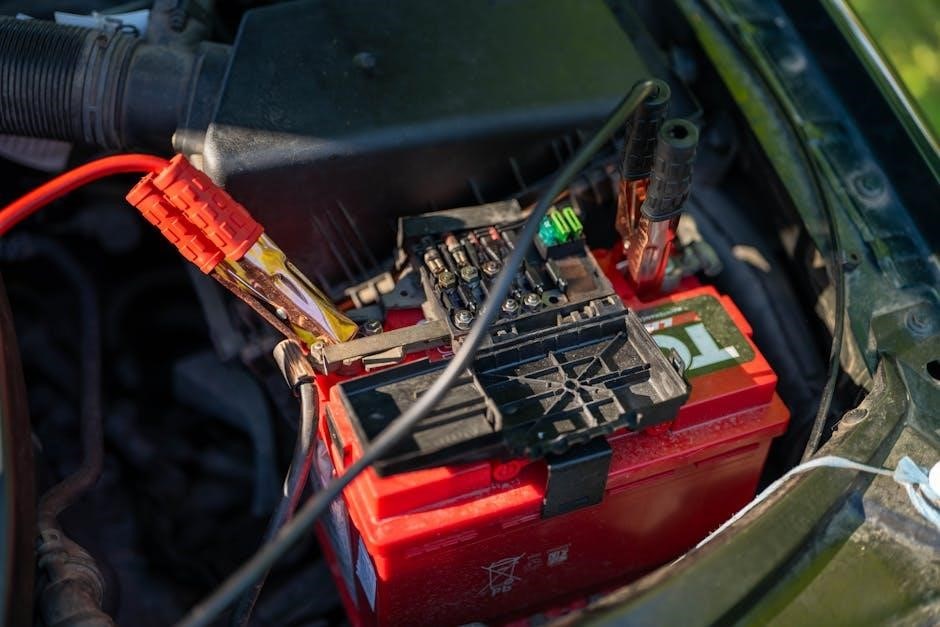
2.2 Safety Precautions
Before starting, ensure the HVAC system is powered off at the circuit breaker. Verify power is disconnected using a voltage tester. Avoid touching live wires to prevent electrical shock. Handle components carefully to prevent damage. Follow local safety regulations and wear protective gear if necessary. Refer to the official manual for compliance details.

Wallplate Installation
Begin by removing the old thermostat and pulling wires through the wallplate’s wire hole. Position the wallplate on the wall, ensuring it is level and securely mounted. Follow the manufacturer’s instructions for accurate installation and proper alignment to ensure optimal thermostat performance and reliability.
3.1 Removing the Old Thermostat
Before installing the new wallplate, carefully remove the existing thermostat. Shut off power to the HVAC system at the circuit breaker. Gently pull the old thermostat away from the wall to access the wires. Disconnect the wires from the thermostat terminals, taking note of their colors and positions for future reference. Ensure all connections are safely detached to avoid damage or short circuits. This step is crucial for a smooth transition to the new installation.
3.2 Mounting the New Wallplate
Mounting the new wallplate begins by pulling the wires through the wire hole; Position the wallplate on the wall, ensuring it is level. Use a pencil to mark the screw hole locations. Secure the wallplate with the provided screws, making sure it is tightly fastened. Proper alignment and leveling are essential for accurate thermostat operation and reliability.
3.3 Power Options for the Wallplate
The Honeywell 3000 wallplate typically relies on power from your HVAC system. Ensure the system is turned off before installation. If your system lacks a common wire, a battery-powered option may be used. Always verify compatibility with your HVAC setup to ensure reliable operation and avoid electrical issues during installation or use.
Wiring the Honeywell 3000 Thermostat
Wiring the Honeywell 3000 involves understanding terminal designations, connecting wires securely, and testing configurations to ensure proper system operation. Always turn off power before starting.
4.1 Understanding Terminal Designations
Understanding terminal designations is critical for proper wiring. The Honeywell 3000 uses terminals like R, W, Y, G, C, and O/B, each serving specific functions. R is for the power source, while W and Y control heating and cooling stages. G operates the fan, and C provides common wiring. Proper identification ensures safe and accurate connections, avoiding system malfunctions. Always refer to the manual for exact terminal roles to match your HVAC setup.
4.2 Connecting Wires to the Thermostat
Connect the wires to the thermostat by matching each wire to its corresponding terminal. Ensure a secure connection by tightening the terminal screws firmly. Double-check that no wires are loose or misplaced. Refer to the terminal designations in the previous section to confirm the correct wiring configuration for your HVAC system. Proper connections are essential for safe and efficient operation.
4.3 Testing the Wiring Configuration
After connecting the wires, turn the power back on and test each system function to ensure proper operation. Check heating, cooling, and fan modes. Verify the display accuracy and ensure all connections are secure. Use the thermostat’s built-in test mode if available. If issues arise, consult the troubleshooting section or the official Honeywell manual for guidance.

Thermostat Mounting and Setup
This section covers installing the Honeywell 3000 thermostat, ensuring it’s level and securely mounted. It also guides you through initial power-up and basic configuration steps.
5.1 Leveling the Thermostat for Accuracy
Proper leveling ensures accurate temperature readings and operation. Use a bubble level to check the thermostat’s alignment. Mount the wallplate on a level surface, adjusting as needed. Mark hole positions, secure the wallplate, and ensure the thermostat is straight. Proper leveling prevents sensor errors and maintains reliable performance. Follow the guide for precise alignment.
5.2 Securing the Thermostat to the Wall
After leveling, remove the wallplate and pull wires through the hole. Position the wallplate on the wall, ensuring it is straight. Mark hole positions with a pencil, then secure the wallplate using screws or anchors. Gently press the thermostat onto the wallplate until it clicks into place, ensuring a snug and even fit.
5.3 Initial Power-Up and Basic Configuration
After securing the thermostat, turn on power at the circuit breaker. The display should light up, indicating successful power-up. Use the system switch to select heating or cooling mode. Set the temperature and fan settings as desired. Ensure all basic configurations are correct before proceeding to advanced settings or testing the system operation.

Advanced Installer Setup
This section covers advanced installer settings, allowing precise configuration of system-specific parameters. It ensures optimal performance by enabling detailed customization and testing of the thermostat’s functionality.
6.1 Navigating Installer Settings
Navigate the installer settings menu to access advanced configurations. Use the navigation buttons to scroll through options like system type, heat/cool settings, and fan operation. Adjust parameters carefully to ensure optimal performance. Refer to the manual for detailed descriptions of each setting to avoid errors during configuration.
6.2 Configuring System-Specific Parameters
Configure system-specific parameters to tailor the thermostat to your HVAC system. Set options like heat pump configuration, multi-stage heating/cooling, and fan operation. Adjust settings precisely to match your system’s capabilities. Refer to the manual for guidance on configuring these parameters correctly to ensure optimal performance and avoid potential setup errors.
6.3 Running a System Test
After configuring system parameters, run a comprehensive system test to ensure all components function correctly. Start by enabling the installer test mode to verify heating, cooling, and fan operations. Check for proper transitions between modes and confirm sensor accuracy. Address any issues promptly to avoid operational problems later. Refer to troubleshooting guides if needed.
Troubleshooting Common Issues
Identify and resolve common problems like power issues, wiring errors, or sensor malfunctions. Systematic checks ensure proper functionality, addressing issues before they escalate.
7.1 Diagnosing Power Issues
Check the main power source to ensure it’s operational. Verify circuit breakers or fuses haven’t tripped or blown. Inspect wiring connections for looseness or damage. Ensure proper installation of batteries if applicable. Review the wiring diagram to confirm correct terminal connections. If issues persist, consult the troubleshooting section or contact Honeywell support for assistance.
7.2 Resolving Wiring and Connection Problems
Inspect wires for visible damage or corrosion. Verify connections match the wiring diagram. Check for loose or incorrect wire assignments. Ensure terminals are securely fastened. Test system operation after repairs. If issues persist, consult the troubleshooting guide or contact Honeywell support for further assistance. Always follow safety precautions when handling electrical components.
7.3 Addressing Display and Sensor Malfunctions
If the display is blank or inaccurate, check the power source and battery connections. Ensure sensors are clean and free from obstructions. Recalibrate the temperature sensor if readings are off. Consult the manual for specific recalibration steps. If issues persist, replace faulty sensors or contact Honeywell support for further assistance.

Upgrading to a Programmable Version
Upgrading to a programmable Honeywell thermostat offers enhanced scheduling and energy-saving features. Choose models like the Lynx Touch series for compatibility and easy installation, ensuring a cost-effective solution for DIY enthusiasts.
8.1 Choosing the Right Programmable Model
Selecting the ideal programmable thermostat involves considering compatibility, features, and ease of installation. Honeywell models like the Lynx Touch or Home T9 series are excellent choices, offering user-friendly interfaces and seamless integration with existing HVAC systems. Ensure the model supports your system type (e.g., heat pump, forced air) and has the necessary smart features for energy efficiency.
8.2 Steps to Upgrade from the Honeywell 3000
To upgrade from the Honeywell 3000, start by disconnecting power and removing the old thermostat. Install the new programmable model, ensuring compatibility with your HVAC system. Follow the wiring diagram for your chosen model, then restore power and complete the initial setup. Test all functions to confirm proper operation before finalizing the installation.
8.3 Benefits of a Programmable Thermostat
A programmable thermostat offers enhanced energy efficiency, allowing you to schedule temperature changes. It provides convenience, optimizing comfort while reducing energy waste. Compatible with various HVAC systems, programmable models often qualify for rebates and lower utility bills, making them a cost-effective upgrade for long-term savings and improved home climate control.

Specifications and Compatibility
The Honeywell 3000 is designed for compatibility with most HVAC systems, including heat pumps and conventional heating/cooling units. It features a non-programmable interface, making it ideal for straightforward installations. The thermostat operates on 24V AC and includes built-in compressor protection. Its compact design ensures easy wall mounting, while its battery-free operation reduces maintenance needs.
9.1 Technical Specifications of the Honeywell 3000
- Operates on 24V AC power for reliable performance.
- Compatible with heat pumps and conventional HVAC systems.
- Non-programmable design for straightforward temperature control.
- Built-in compressor protection to prevent damage.
- Large, easy-to-read digital display for accurate temperature settings.
- Battery-free operation reduces maintenance needs.
- Supports dual-stage heating and cooling systems.
9.2 Compatibility with HVAC Systems
- Compatible with conventional gas, oil, and electric furnaces.
- Works seamlessly with central air conditioning systems.
- Supports heat pump systems for energy-efficient heating and cooling.
- Designed for single-stage and dual-stage HVAC systems.
- Can be integrated with central air handlers and zoning systems.
9.3 Supported Features and Capabilities
The Honeywell 3000 supports single and multi-stage HVAC systems, including heat pumps, ensuring versatile compatibility. It offers precise temperature control with flexible fan settings and built-in compressor protection to prevent short cycling. Additional features include easy battery replacement for continuous operation and compatibility with central air handlers.
Additional Resources and Support
Access official Honeywell support online for comprehensive guides and troubleshooting. Download the Honeywell 3000 manual for detailed instructions. Explore community forums and FAQs for additional assistance.
10.1 Accessing the Official Honeywell Support
Visit the official Honeywell Home website for comprehensive support resources. Download the Honeywell 3000 manual, access troubleshooting guides, and explore FAQs. Contact Honeywell support directly for assistance or join community forums for peer advice and solutions to common issues.
10.2 Downloading the Honeywell 3000 Manual
Download the Honeywell 3000 manual directly from the Honeywell Home website. Visit the support section, enter your product model (e.g., TH3110D1008), and access the PDF guide. This manual provides detailed installation, operation, and troubleshooting instructions tailored to your thermostat model, ensuring a seamless setup experience.
10.3 Finding Community Forums and FAQs
Honeywell’s official support page offers a wealth of community forums and FAQs. Visit their website to explore discussions, troubleshooting tips, and expert advice. Engage with other users and professionals to resolve issues, optimize settings, and enhance your Honeywell 3000 thermostat experience effectively.